
 English
 Svenska
Categories
Setting up taxes
Set up automatic or manual taxes so the right rates apply at checkout.
On this page
As an online merchant, you may need to collect taxes (sales taxes in the US, VAT in Europe and Japan, GST in Canada, and so on) and then periodically forward the collected tax amounts to the appropriate tax authorities.
What taxes should I set up
Taxation rules differ depending on the country where the online business is based. Tax rates can depend on the types of products, your business location, the consumers’ location, and more. For example, merchants that sell e-goods to customers in the EU should charge taxes on digital products.
Check with your local tax experts whether you sell taxable goods and what tax rates apply to them before moving forward with online sales.
How to configure taxes
Once you know where your business is responsible for charging taxes, make sure to configure your store to meet your local tax laws.
There are two ways to set up taxes in a store:
- Automatic taxes. These are available for merchants in the USA, Europe, UK, Canada, Australia, New Zealand, India, South Africa, Taiwan, Singapore, Malaysia, Indonesia, Saudi Arabia, the Canary Islands, Melilla, and Ceuta. Automatic taxes provide up-to-date rates across the store and can be enabled in one button click.
- Manual taxes. If automatic taxes are not available for your country or your business requires a specifically tailored taxation scheme, you can configure taxes manually.
Setting up automatic taxes
Availability
If you are based in a country where automatic calculation of taxes is available, you can enable it in your store. As a result, the up-to-date tax rates of your region apply to all products.
To set up automatic taxes:
- Enter your actual company address in the store admin, Settings → General. This address is needed to calculate and apply the right tax rate to orders at checkout.
- Enable automatic taxes in Settings → Taxes.
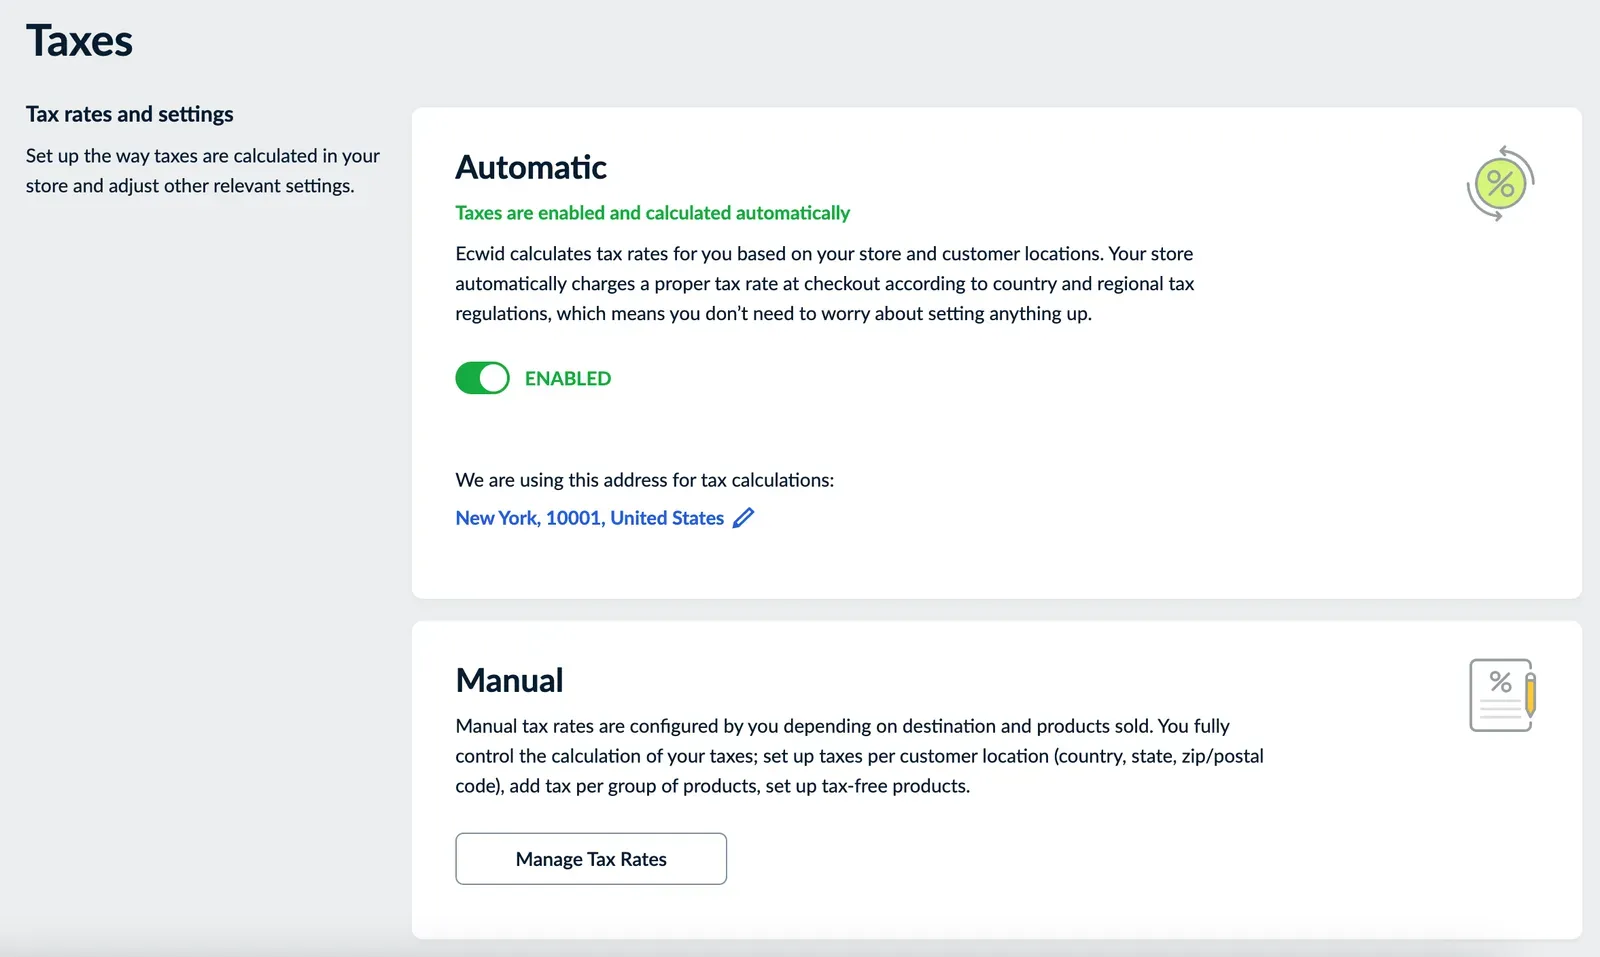
Once enabled, automatic taxes determine a precise tax rate at checkout depending on where you and your customer are located, and apply tax to each order.
By default, the same standard tax rate of your store’s region applies to all products. If some of your products are taxed differently (for example, they are tax-exempt), you can change the tax rate for them.
Setting up manual taxes
You can manually configure your store to calculate tax rates for different regions, zones, and countries. You should set up taxes manually if:
- automatic taxes are not available for your country (currently available for the US, Europe, UK, Canada, Australia, New Zealand, India, South Africa, and some other countries), or
- you need a complex taxation scheme tailored to your business (for example, you want to charge taxes when selling worldwide).
You can configure taxes manually in the store admin, Settings → Taxes. Below is how to add a 10% tax for a state to illustrate the setup process.
Step 1: Add a zone
Create a destination zone for the tax rate to apply to. If the same tax rate applies to several different states, you can create one zone consisting of these states and set up a tax rate for this zone.
To add a zone for the tax:
- From your store admin, go to Settings → Taxes & Invoices.
- In the Manual section, click Manage Tax Rates.
- Click + Add New Tax.
- Click Save.
- Click Manage zones (global) to open the Destination zones page.
- Click + Add New Zone.
- Click Add State, Add Country, or Add Region and add the necessary state, country, or region.
- Set a name for the zone that is clear to you. For example, “States with 10% tax rate”. Customers do not see the name you pick for the zone.
- Save the changes.
Step 2: Add a tax rate for the zone
- From your store admin, go to Settings → Taxes & Invoices. If automatic taxes are enabled, make sure to disable them.
- In the Manual section, click Manage Tax Rates.
- Click Add New Tax.
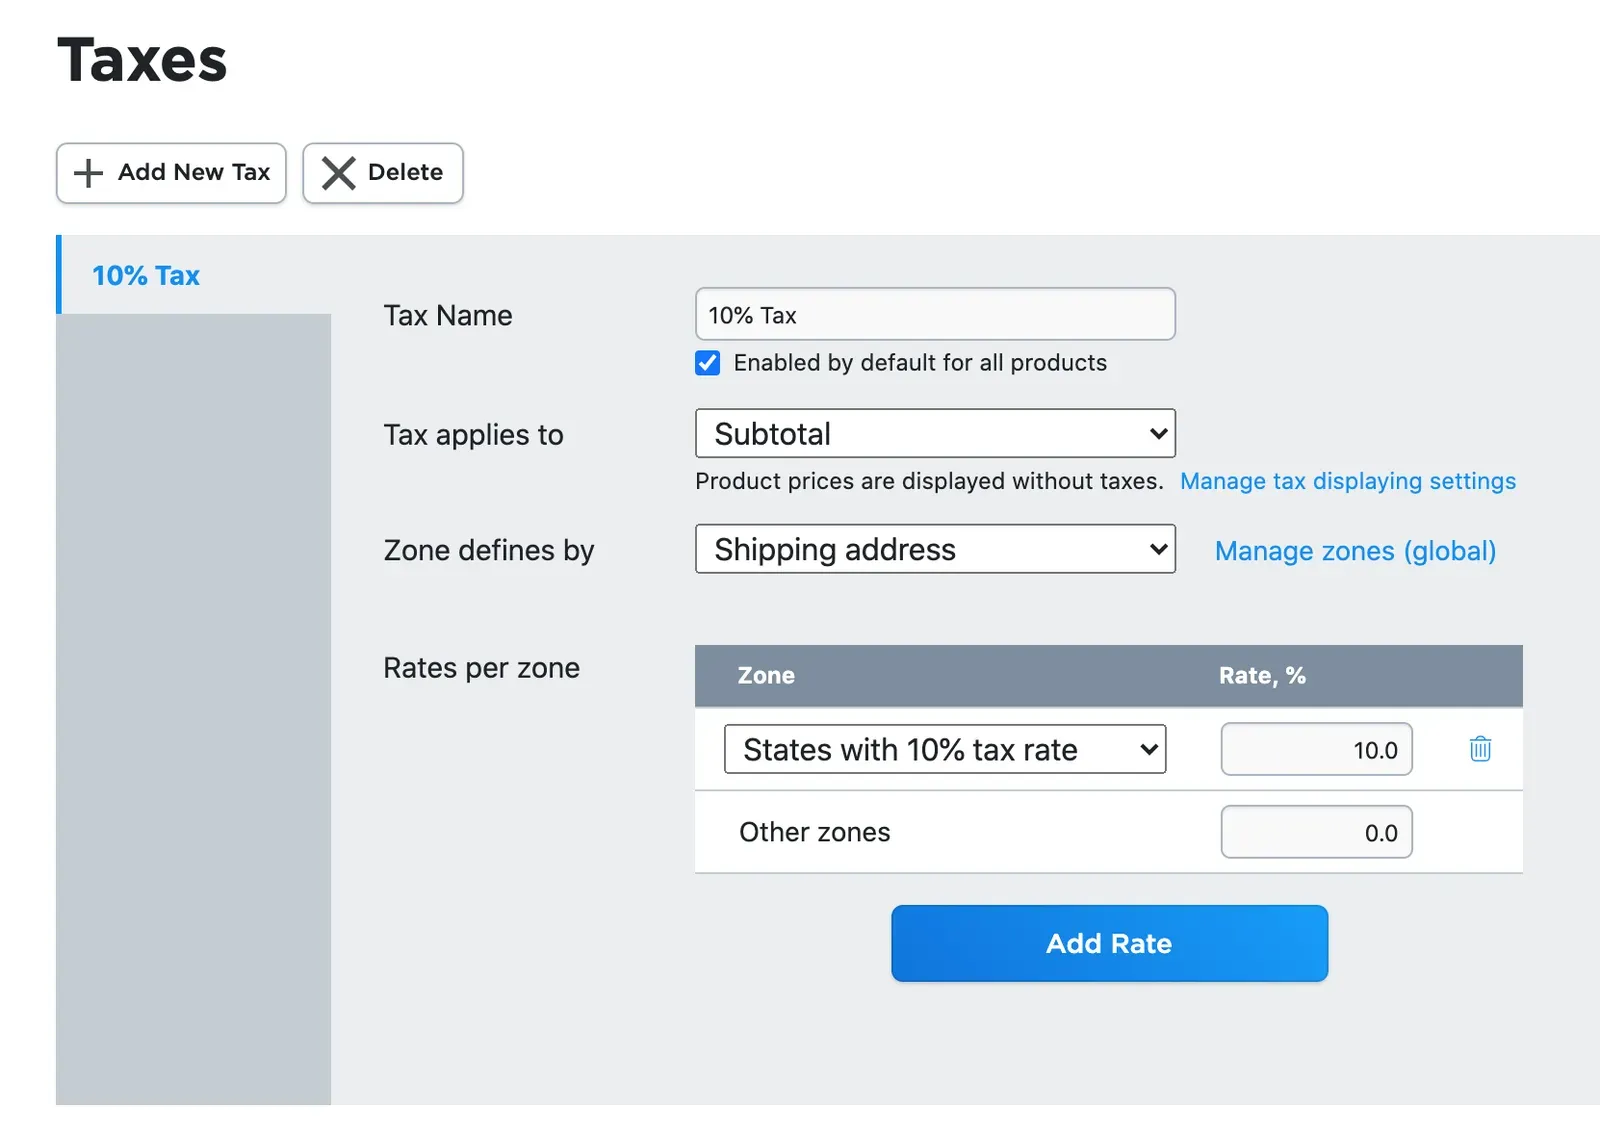
- Enter your tax name. For example, “10% Tax”. Customers see the name you pick for the tax at checkout.
- If the tax applies to all products, tick the Enabled by default for all products option.
- Choose whether the tax applies only to the subtotal or to the subtotal and shipping.
- (Optional, based on your country) Tick the Include tax in product prices option if you want the price to include tax. Customers see the tax-inclusive product prices in the catalog as soon as your store detects their location. Otherwise, tax is added at checkout once the buyer fills out the address form.
- Choose what defines the zone for a customer. It can be the shipping or billing address.
- Click Specify rates per zone. Select the zone you created in Step 1 and enter the applicable tax rate.
- Make sure the tax is enabled and save the changes.
Switching pricing schemes
Your product prices are not automatically updated if you switch the pricing scheme (net prices versus gross prices). Check your product prices and update them manually after the switch to avoid unexpected price changes.
If you have several taxes or zones, repeat the steps above for each of them.
Per-product taxes
If you need to enable or disable a tax for a certain product, you can do it on the product’s edit page, in the Taxes tab.
How to get a tax report
Different countries have unique tax reporting requirements. You should consult your local tax professionals on how and how often you should file and remit the collected taxes to the government.
If you use accounting software when working on tax reports, you can import your store’s order data, including the collected taxes.
For automatic import of order data, you can connect your store with Quickbooks, Xero, or Freshbooks accounting software (integration with these services is available in the form of apps from the App Market).
Otherwise, you can export the order data from your store to a CSV file, then import the downloaded CSV file into your accounting software or send it to an accountant who handles it for you. You can also open the file in a spreadsheet and summarize the numbers manually if you like.
If necessary, you can also print out invoices (and tax invoices) for your records, or download them as a PDF file.
Automatic sales tax reports
With automatic taxes, US merchants can also get a sales tax report and file taxes via the TaxJar app.
Related topics
- Product-specific tax rates
- Creating tax invoices
Related articles
- Introduction to product inventoryTrack product stock, choose out-of-stock behavior, and prevent overselling in your online store.
- Choosing a shipping strategy for your storeCompare shipping strategies and set up shipping methods, origin, and zones for your store.
- Adjusting your storefront designCustomize your storefront's product cards, product pages, categories, and navigation.
Can’t find what you need?
Contact our team. We’re here 24/7 by email and ticket.