
 English
 Svenska
Categories
Using Google Search Console
Verify your Website Builder site with Google Search Console and submit your sitemap.
On this page
Google Search Console helps you manage how Google indexes your site. The Website Builder makes it possible for you to take advantage of Google’s website optimization tools. In this tutorial, we give you step by step instructions on verifying your site and submitting a sitemap to Google.
Step 1: Getting the verification tag
If your site is not yet published on the web, you need to publish it first, because you will need the URL (web address) during verification. If you have not published your site yet, follow the steps in the Publishing your website tutorial.
Once published, copy and save the URL of your site, then follow these steps:
-
Head over to Google Search Console (opens in a new tab) to get started. If you do not have a Google account, you will need to create one. Otherwise, sign in with your Google login details.
-
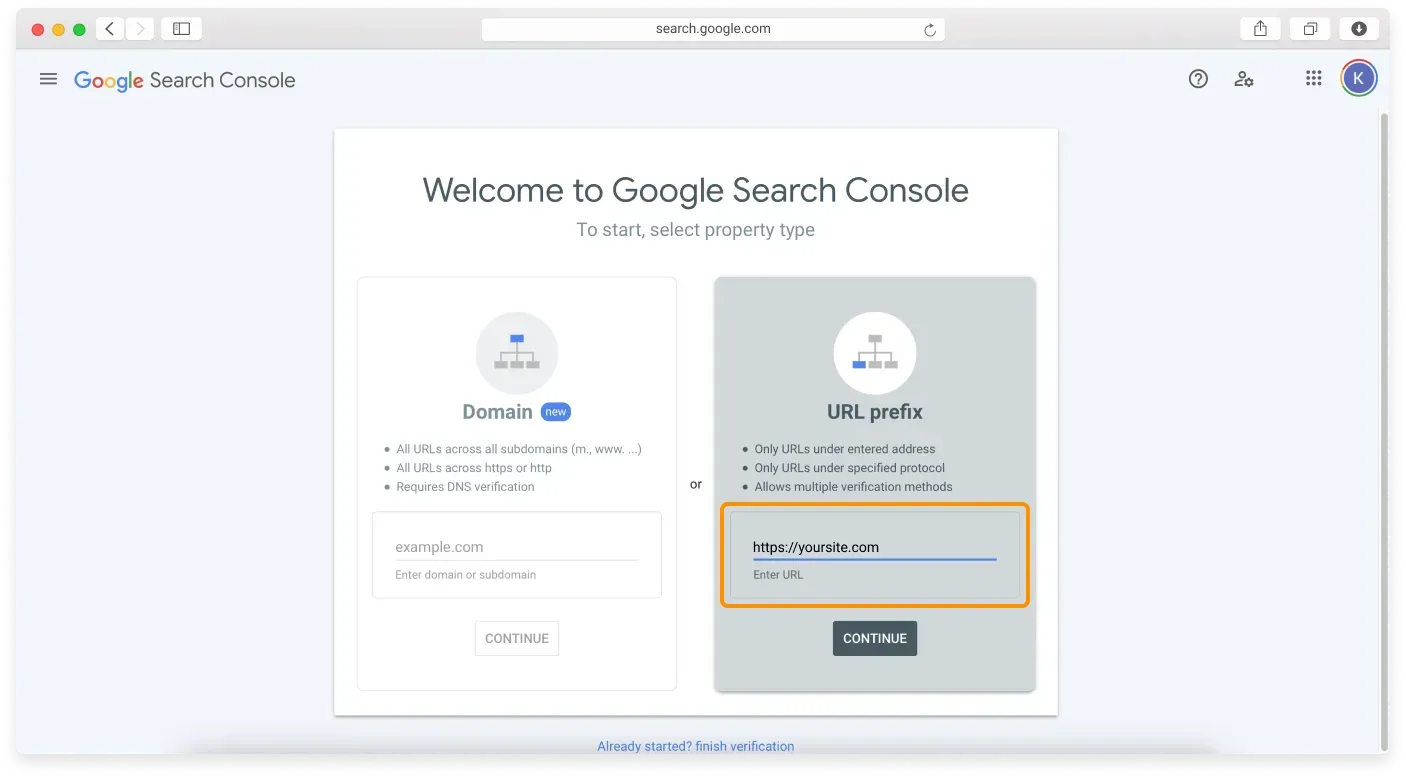
In the URL prefix field, enter the address of your website with the HTTPS part, and click Continue.
-
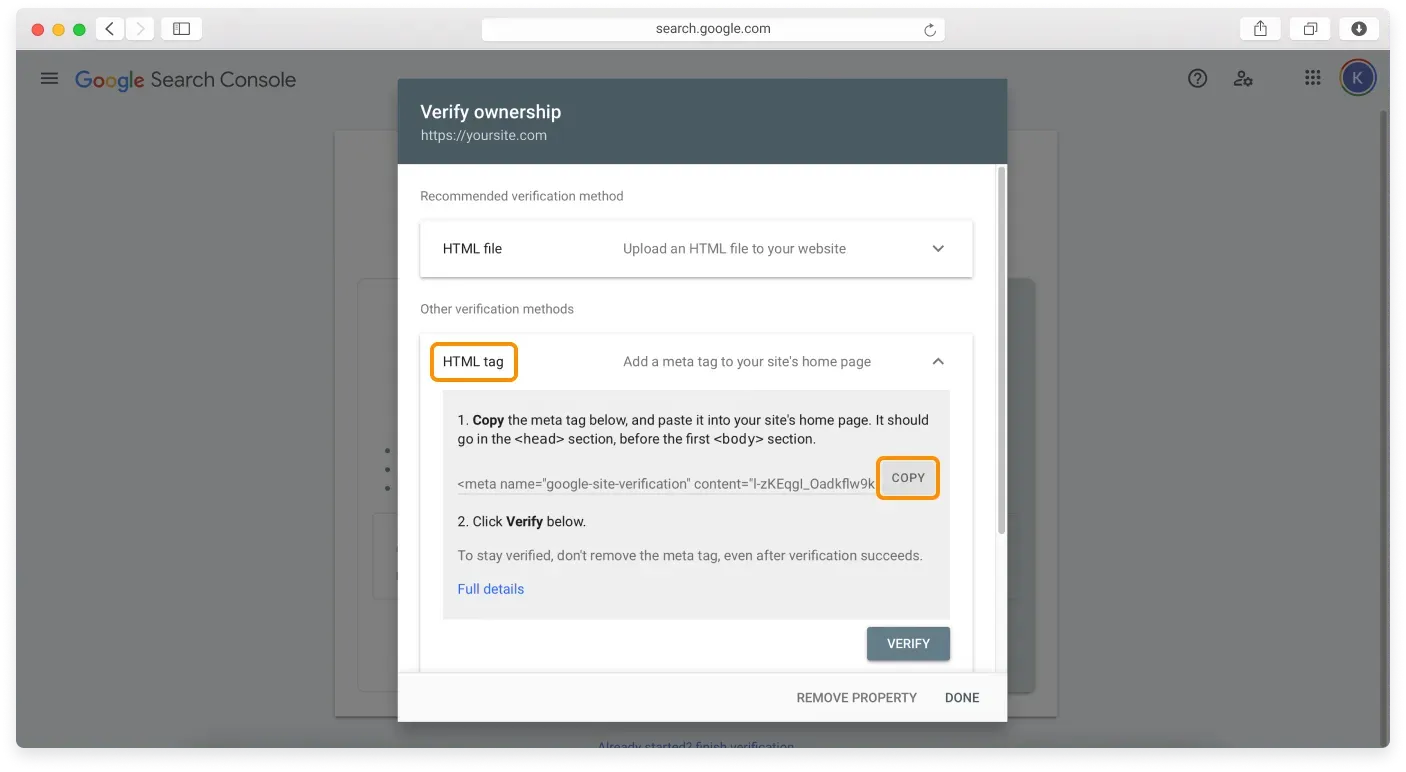
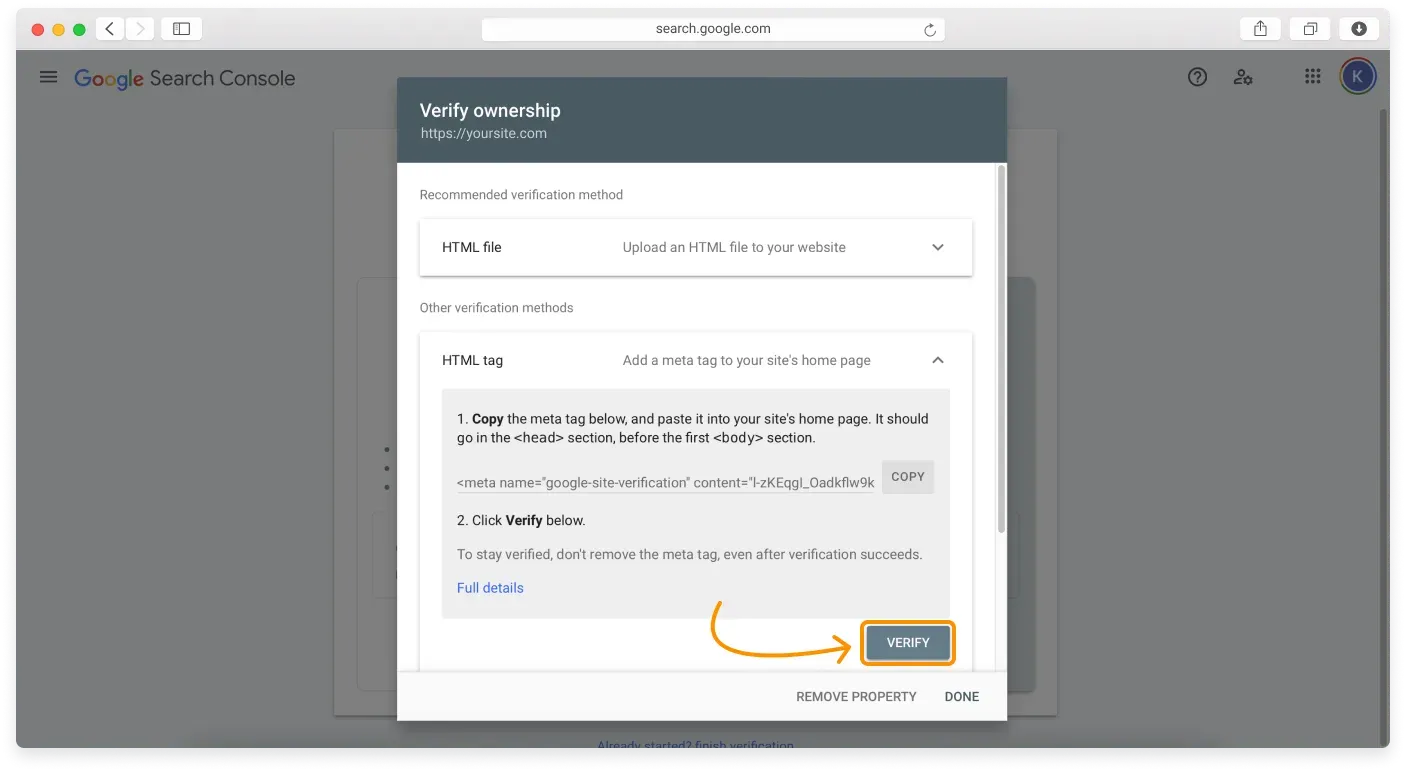
The Verify ownership window opens. Choose the HTML tag as the verification method and click Copy.
Keep this window open
Keep the Google Search Console window open for now. You will need to come back to it in Step 3.
Step 2: Adding the tag to your site
Now that you have the verification code, you need to add it to your site. Here is how:
-
In the Website Builder, click the Main menu button in the top left corner of the screen.
-
Click Settings on the Sidebar.
-
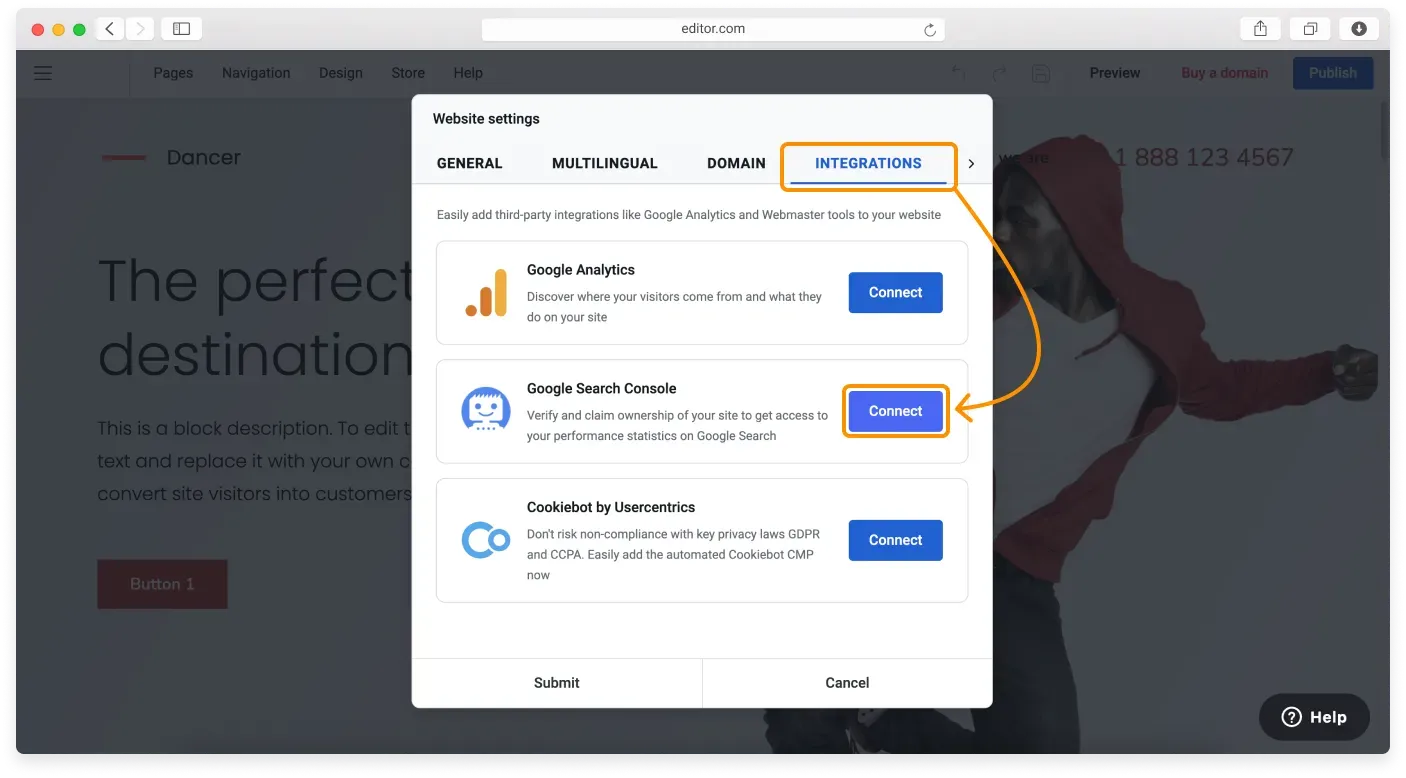
In Website settings, click the Integrations tab and click the Connect button next to Google Search Console.
-
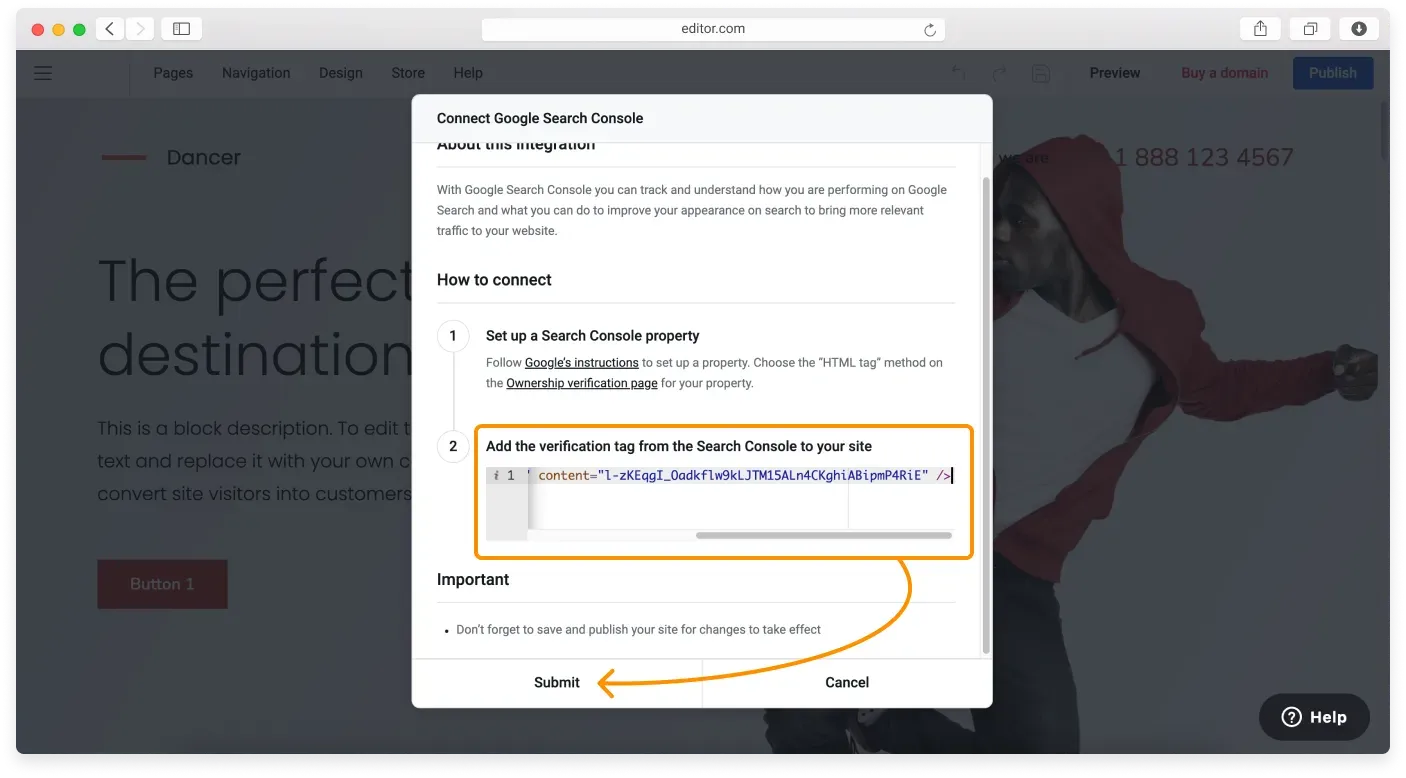
In the next window, paste the HTML tag you copied from the Google Search Console page into the code field and click Submit.
-
Click Publish in the Website Builder to make the changes live.
Step 3: Verifying the site in Google Search Console
Once you have added your code to your website and republished it, go back to the Google Search Console page. Click the Verify button at the bottom of the page.
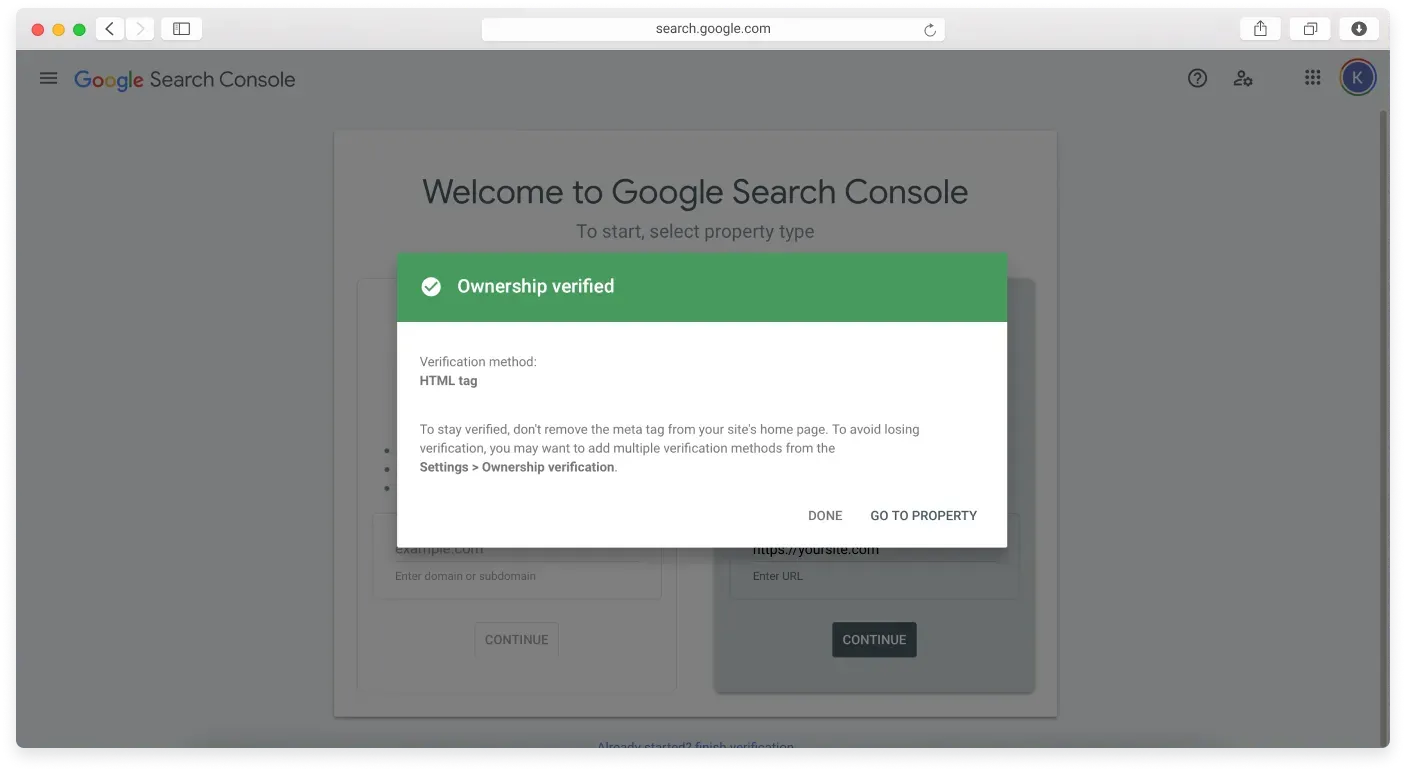
If you verified your site correctly, you will see the Ownership verified message like the one below.
Submitting a sitemap to Google Search Console
When you publish your site, the Website Builder generates a sitemap for it. You will not notice this because it happens behind the scenes. You can submit your sitemap to Google using Google Search Console. This gives Google more information about your site. If you want to learn more about sitemaps and why they are useful to Google, see About Sitemaps (opens in a new tab).
The sitemap for your published site is the site’s URL (web address), followed by /sitemap.xml.
To submit your sitemap to Google Search Console, follow these steps:
-
Log into your Google Search Console account.
-
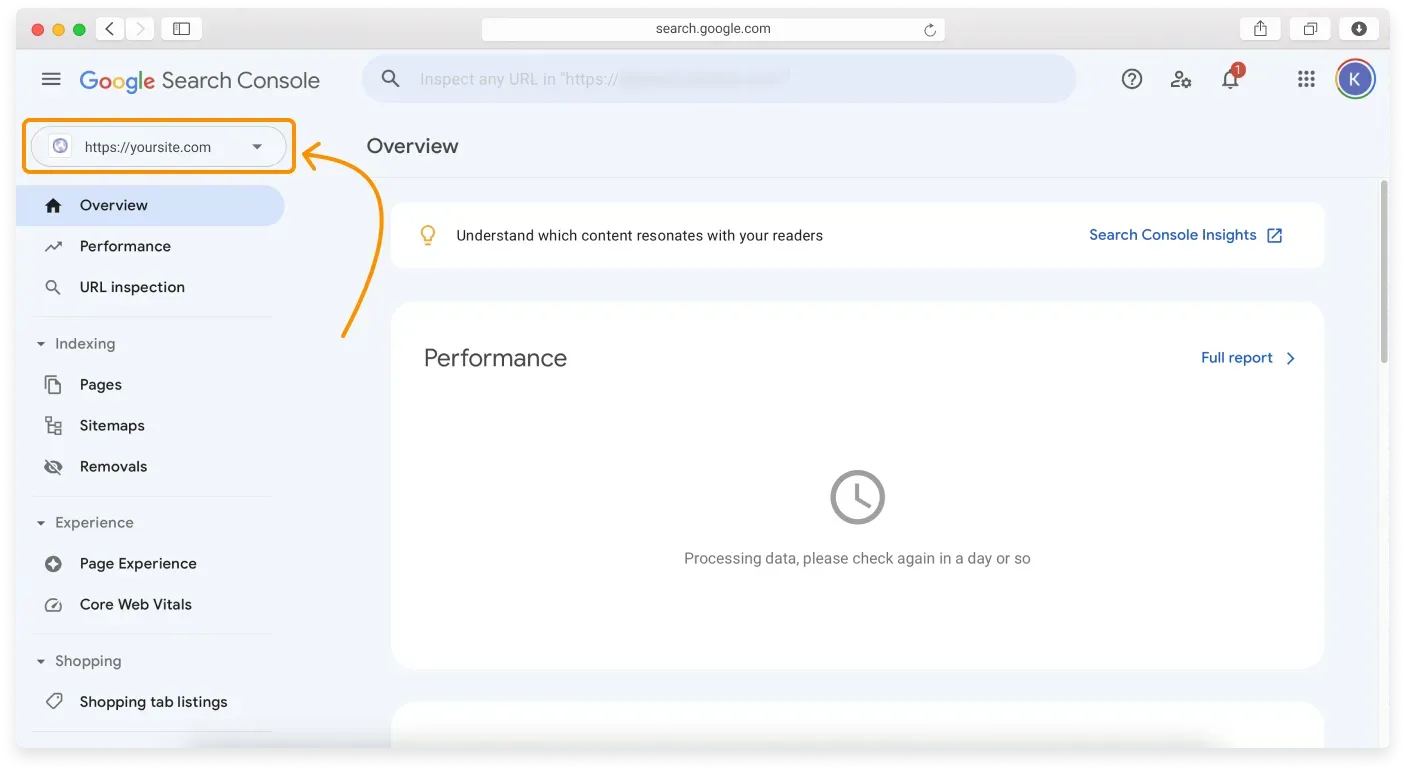
If you have multiple sites, make sure you are on the right site’s dashboard page.
-
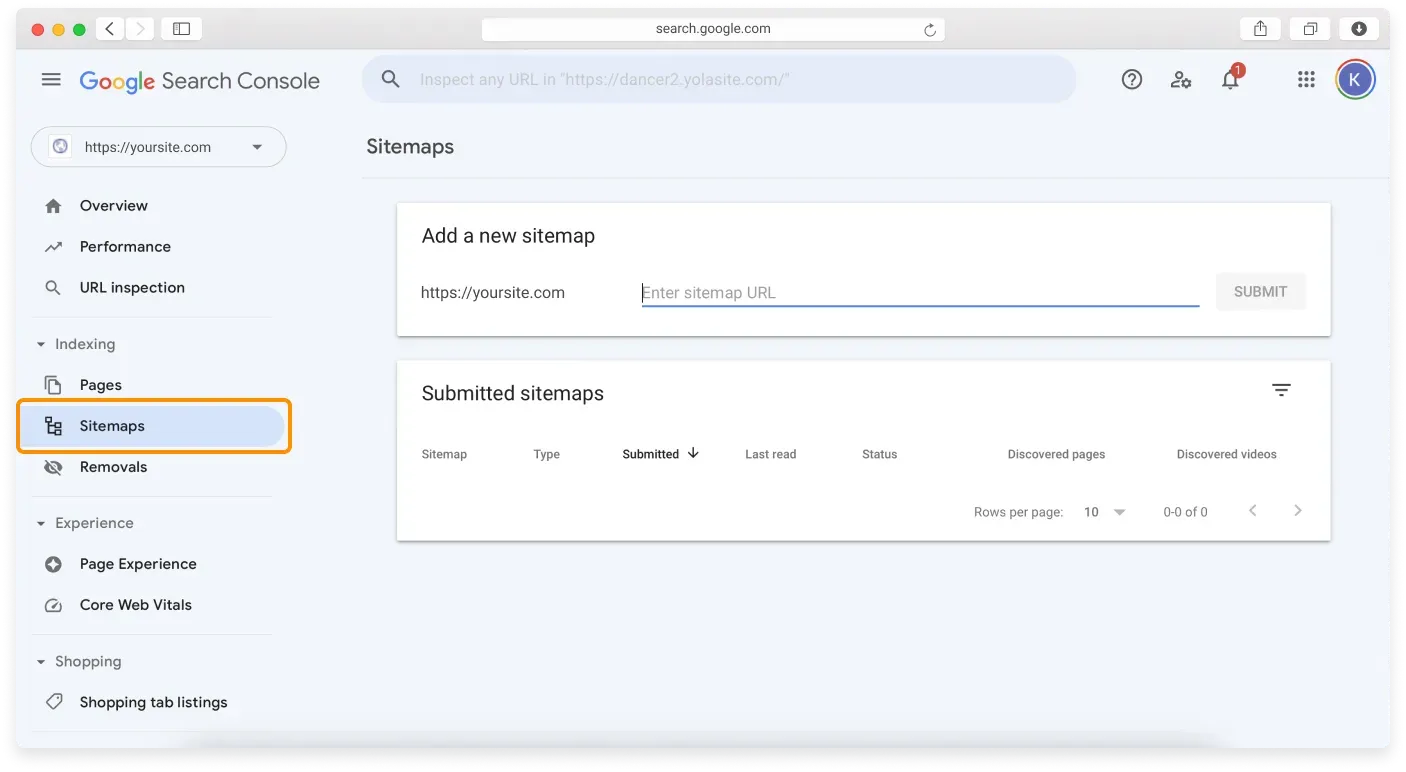
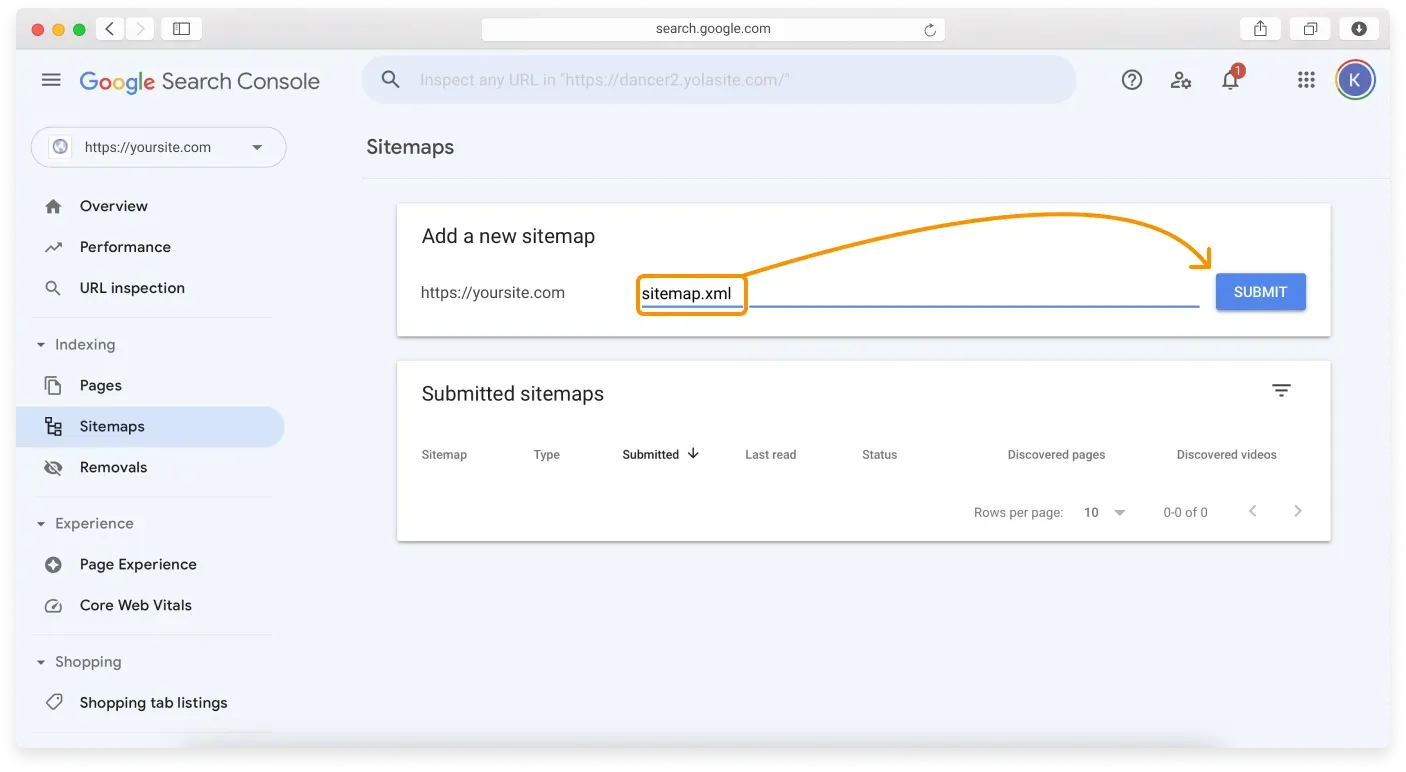
Click Sitemaps on the sidebar to open the Sitemaps settings.
-
Type sitemap.xml into the Add a new sitemap field and click Submit.
-
You will see a Sitemap submitted successfully message.
Now, when Google crawls your site, you can log into your Google Search Console account to see data that helps you optimize your site for search engines.
Google Search Console FAQ
Where do I get more information on how Google Search Console works?
- The Google Search Console Help (opens in a new tab) page is packed with information.
Google Search Console gives me errors, and I do not know what they mean.
- You can find detailed information on what those errors mean and how to fix them here: Crawl Errors (opens in a new tab) and HTTP Status Codes (opens in a new tab).
Related articles
- Customizing your page SEO settingsAdd a search friendly title, description, and keywords to each page of your Website Builder site.
- Using metadata to improve your SEOUnderstand how title tags, meta descriptions, and keywords help search engines rank your pages.
- Viewing your site analyticsTrack visitors, visits, and pageviews with the built in analytics in the Website Builder.
Can’t find what you need?
Contact our team. We’re here 24/7 by email and ticket.