
 English
 Svenska
Categories
Generating a homepage with AI
Use the six-step AI wizard to share your business details and create a draft homepage.
On this page
By using artificial intelligence (AI) to generate your homepage, you begin a simple journey to establish your online presence. This set of tools lets you quickly create a draft for your site. Keep in mind that while AI helps with content generation and gives you ideas, you will need to refine your site to make it perfect.
This tutorial guides you through a six-step setup that gathers essential details about your business and preferences. You can skip some steps, but it is best to provide as much information as possible. This allows the AI to tailor the content to suit your needs, resulting in a more personalized website.
Let’s explore how to use AI for your homepage creation.
Step 1. General
The site setup starts with the general site setup wizard, where you choose the type of website and template you would like to use. Then you give your website a name, choose the language, and the AI magic begins.
Your main language
The language you choose in Step 3 of the general site setup wizard becomes the Main language of your site. The AI relies on the Main language when generating content for your site. You can change it later if needed.
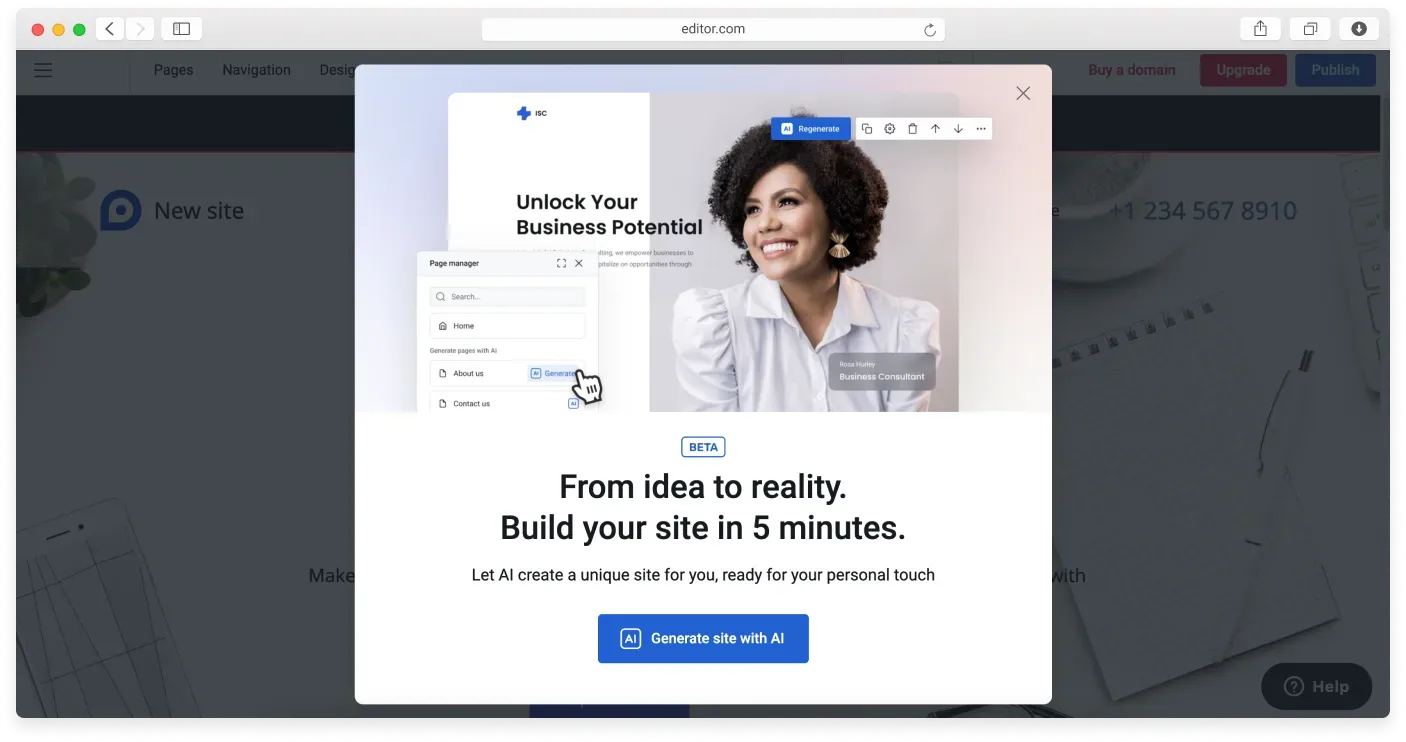
You will see a banner inviting you to use AI to create your site content. You can opt out by clicking the X in the top right corner and using a regular website template with demo content instead. Please note that only Premium plan users can restart the generation process for the current site after closing this dialog.
If you decide to go for it, click the blue Generate site with AI button and proceed to the six-step AI site setup.
Step 2. Describe your business
This is an important step. You can set the business name for your website that will be used in the editor (if it differs from the site name you entered in the previous step) and add a business description.
The business description is essential for creating a viable version of your website, so make it as detailed as possible within 1000 characters, including spaces.
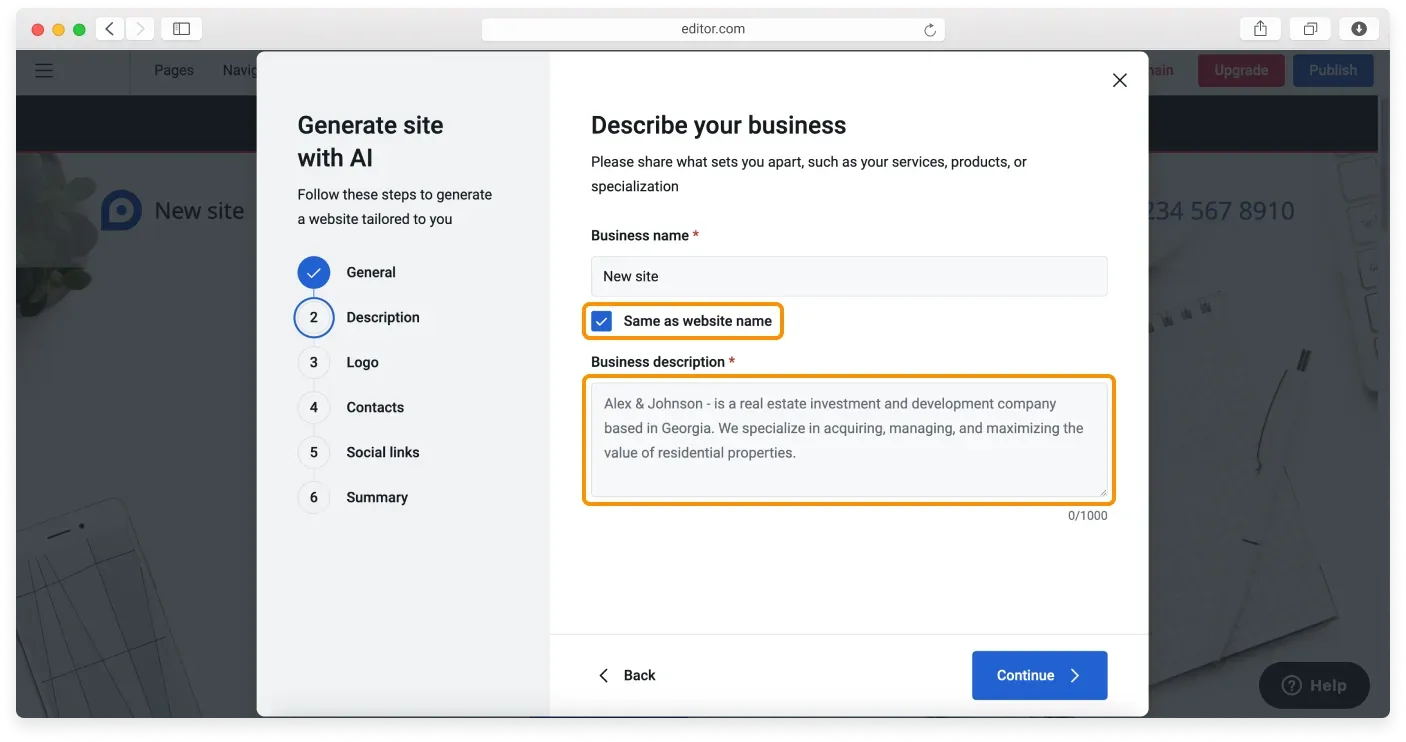
Click Continue when you are happy with the description.
Step 3. Upload your logo
Here you can upload your logo, which is automatically added to the relevant areas on the site. Click the Upload logo button to select the file on your device.
When you are done, click Continue.
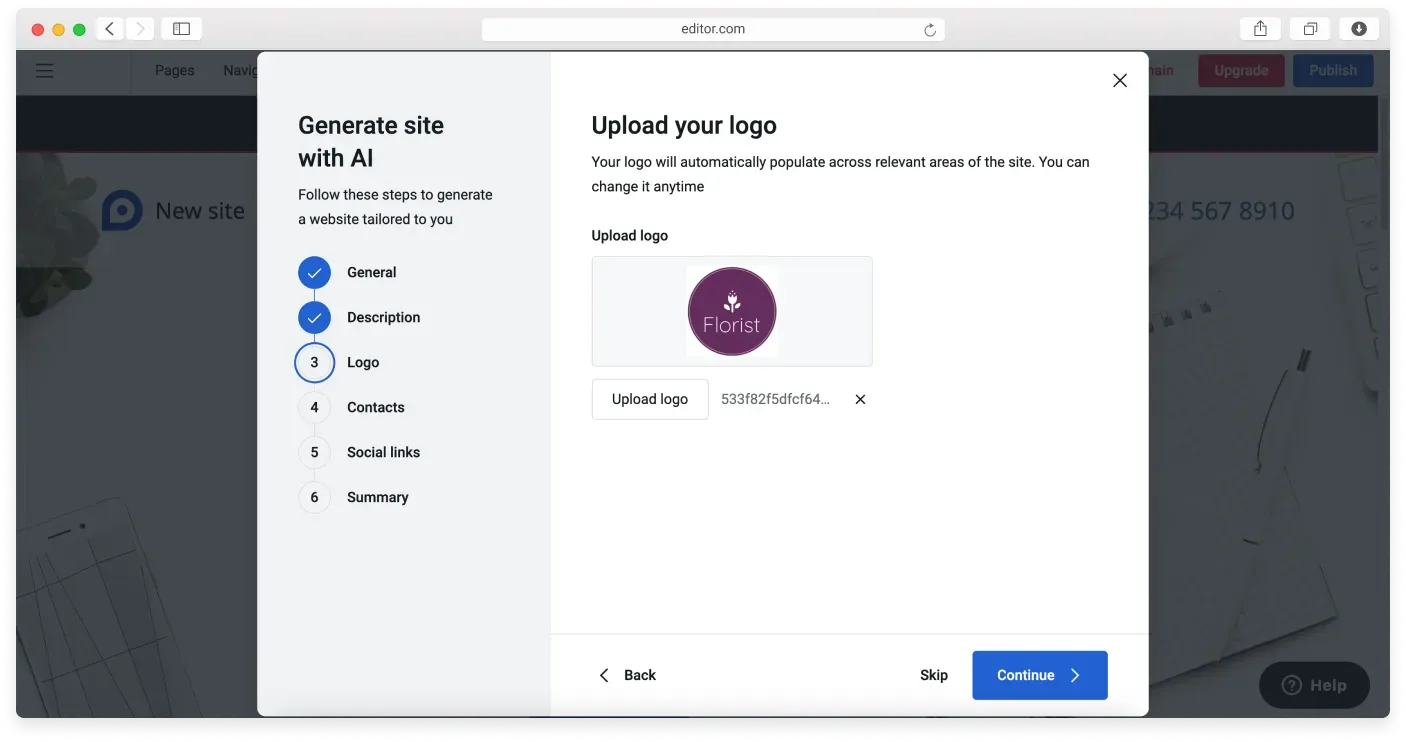
Click Skip if you need more time to work on your logo. You can add it later in the editor after generating your site.
Step 4. Add contact information
This step lets you add your contacts just once, save them, and populate them across the site in your header, footer, and various types of pre-designed blocks.
Your registration email is already filled in, and you can change it now or later in the editor. You can also fill in the Address, Phone, and Working hours fields here, though it is not required.
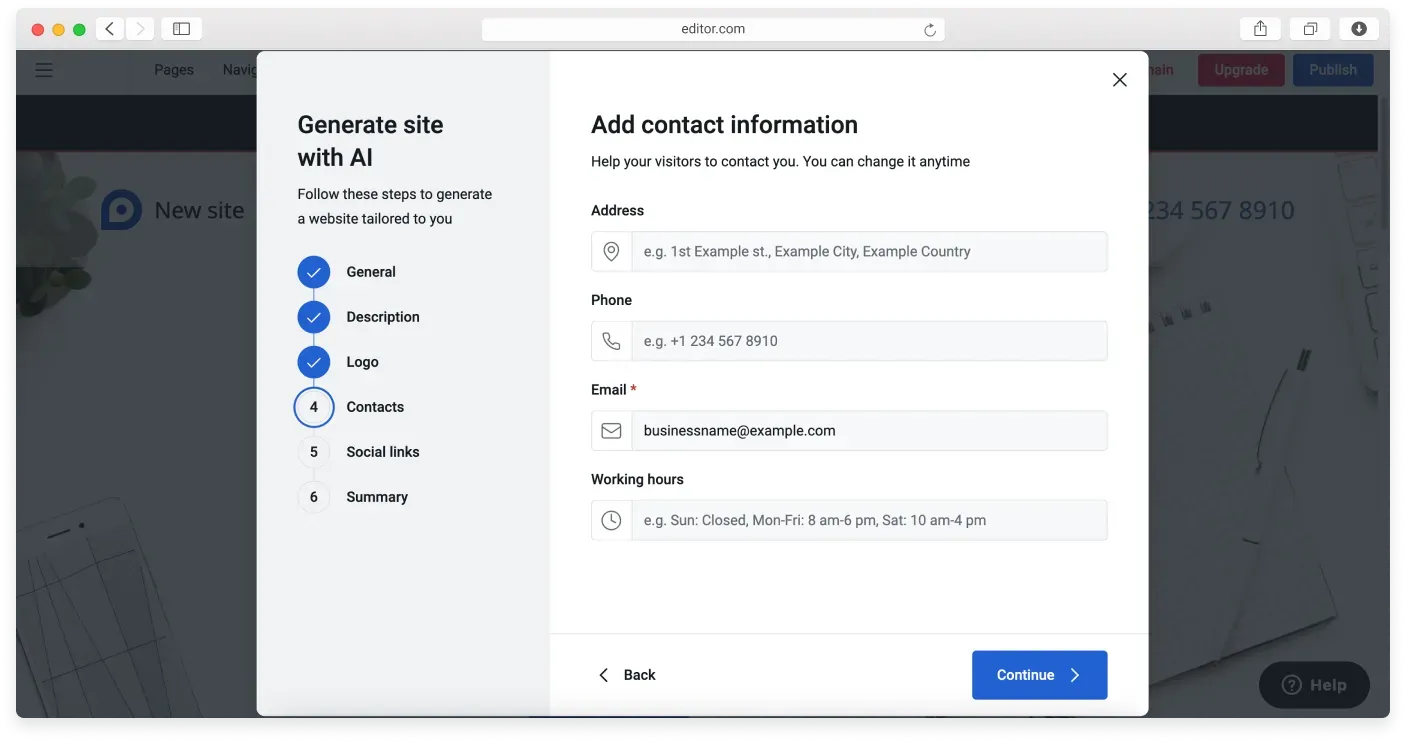
Click Continue to move to the next step.
Step 5. Social links
Here you can add your social links once, and they are saved and used in all relevant places on your site. Add as many as you like by clicking Add another link. If you change your mind, delete a link by clicking the trash bin icon near it.
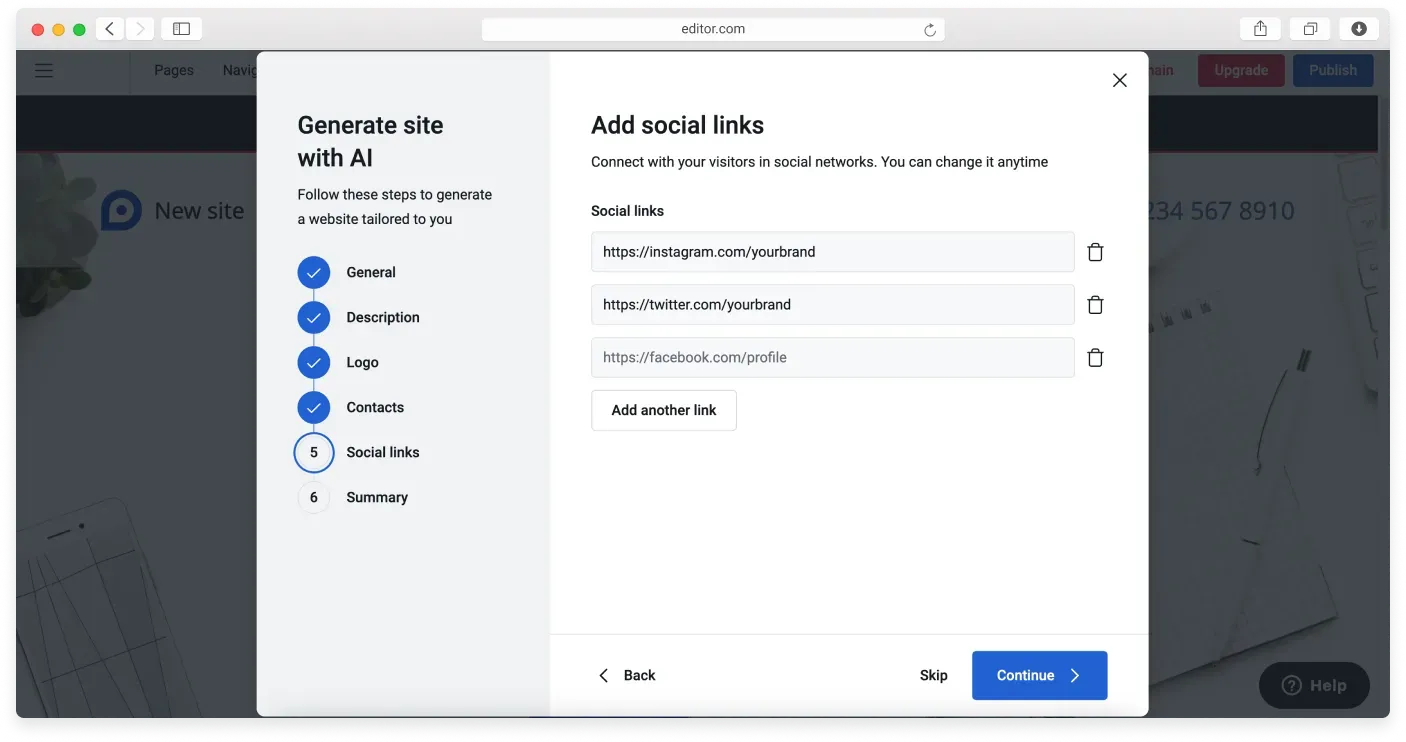
Click Continue to move to the last step.
Step 6. Summary
Check the information you have provided to the AI wizard one more time. You can go back and change it or add something if you want. When you are happy with it, click Generate site and watch your site being created.
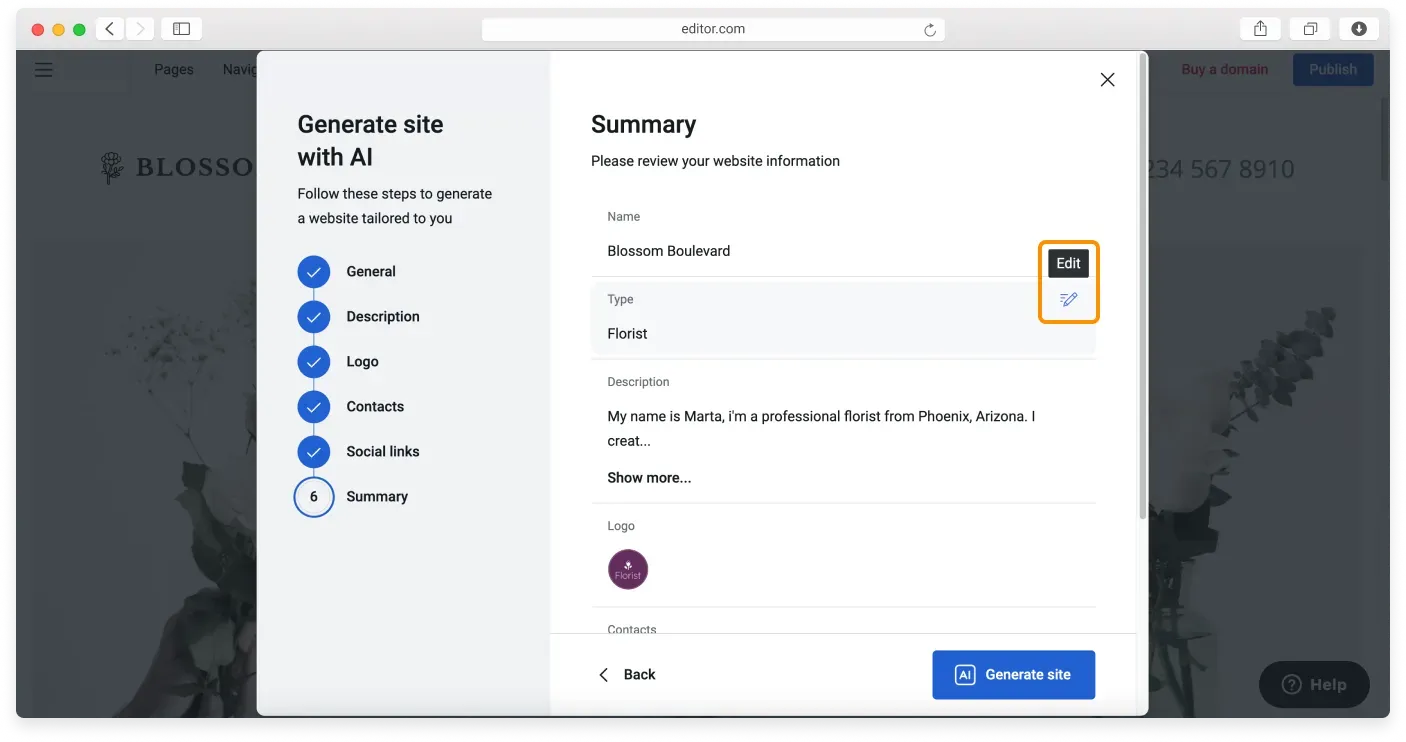
Once your homepage is ready, take a look at our guides on generating page content with AI and generating block content with AI.
Related articles
- About the Website Builder AI toolsAn overview of the AI tools that help you set up a site, generate pages, and create content blocks.
- Generating page content with AICreate additional pages quickly by letting AI draft the content for each page type.
- Generating block content with AIUse AI to create, change, or refresh the content inside individual blocks on your site.
Can’t find what you need?
Contact our team. We’re here 24/7 by email and ticket.