
 English
 Svenska
Categories
Adding and customizing your logo
Add a logo to your header and footer, then resize and replace it as needed.
On this page
A logo adds a professional look to your site. It is also a great way to represent your company, as people tend to remember images better than text, and an eye-catching logo helps you stand out from the crowd.
With the Website Builder, you can add a logo to both your header and your footer.
Enabling a logo in the Header block
Most templates come with a logo already enabled in the header. If you’ve chosen one without it, you can add it manually. Here’s how:
-
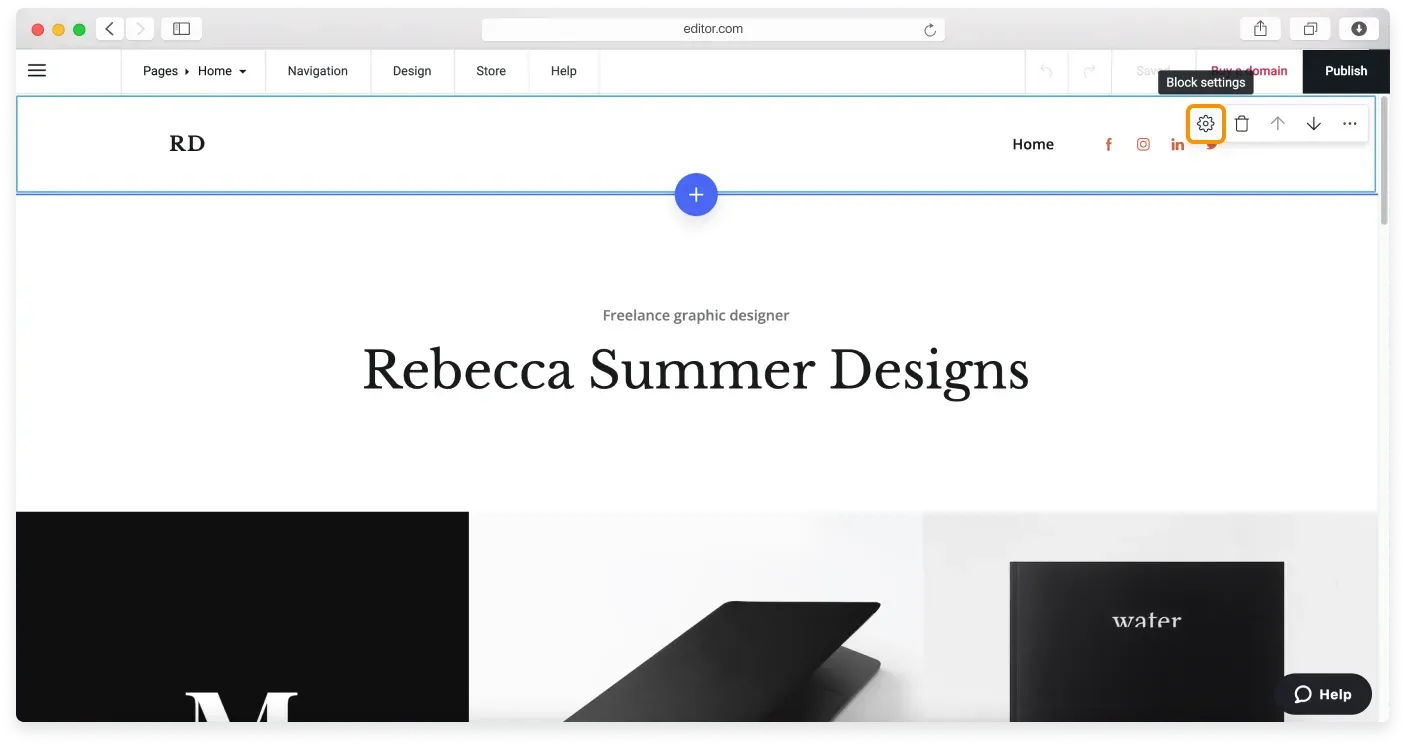
Hover over the Header block to activate its control pane, then click the Block settings icon.
-
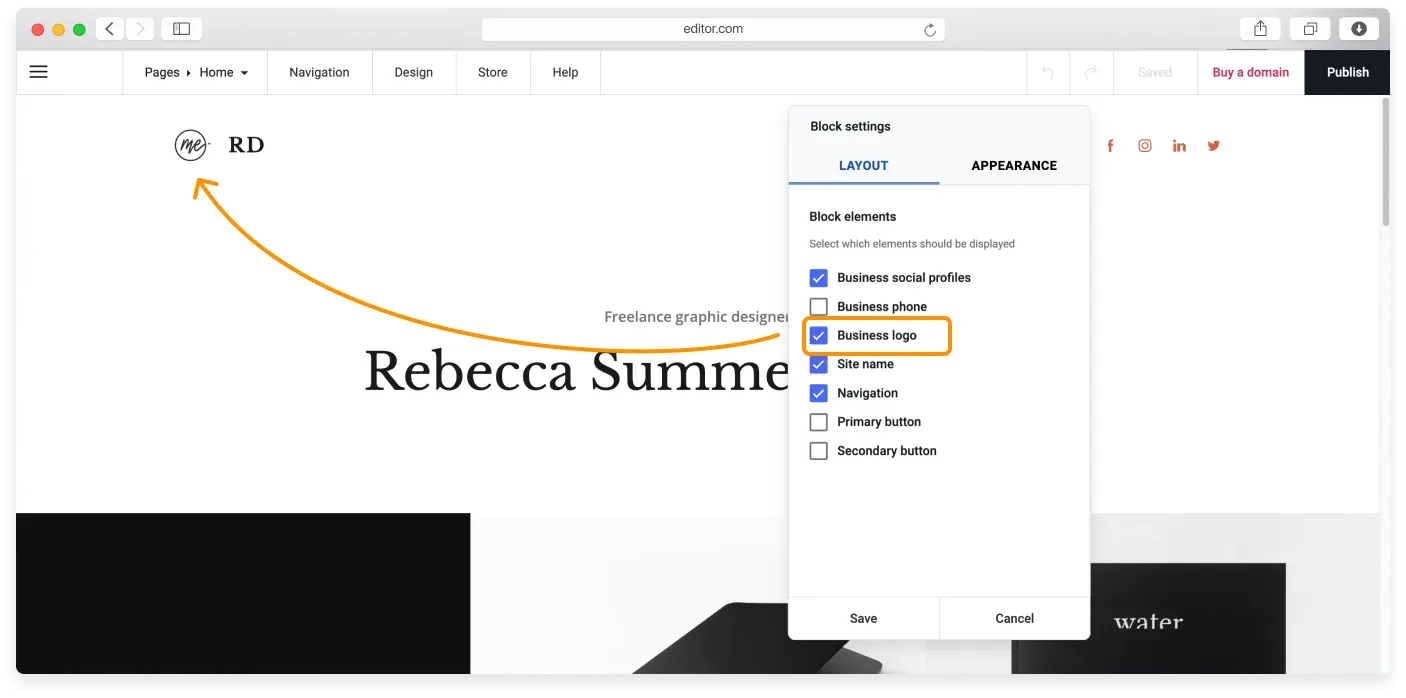
In the Layout tab, tick the Business logo checkbox, and a placeholder with a sample image will appear near your site’s name.
-
Click Save to confirm the change.
Changing your logo
To replace the sample logo with your own, follow these steps:
-
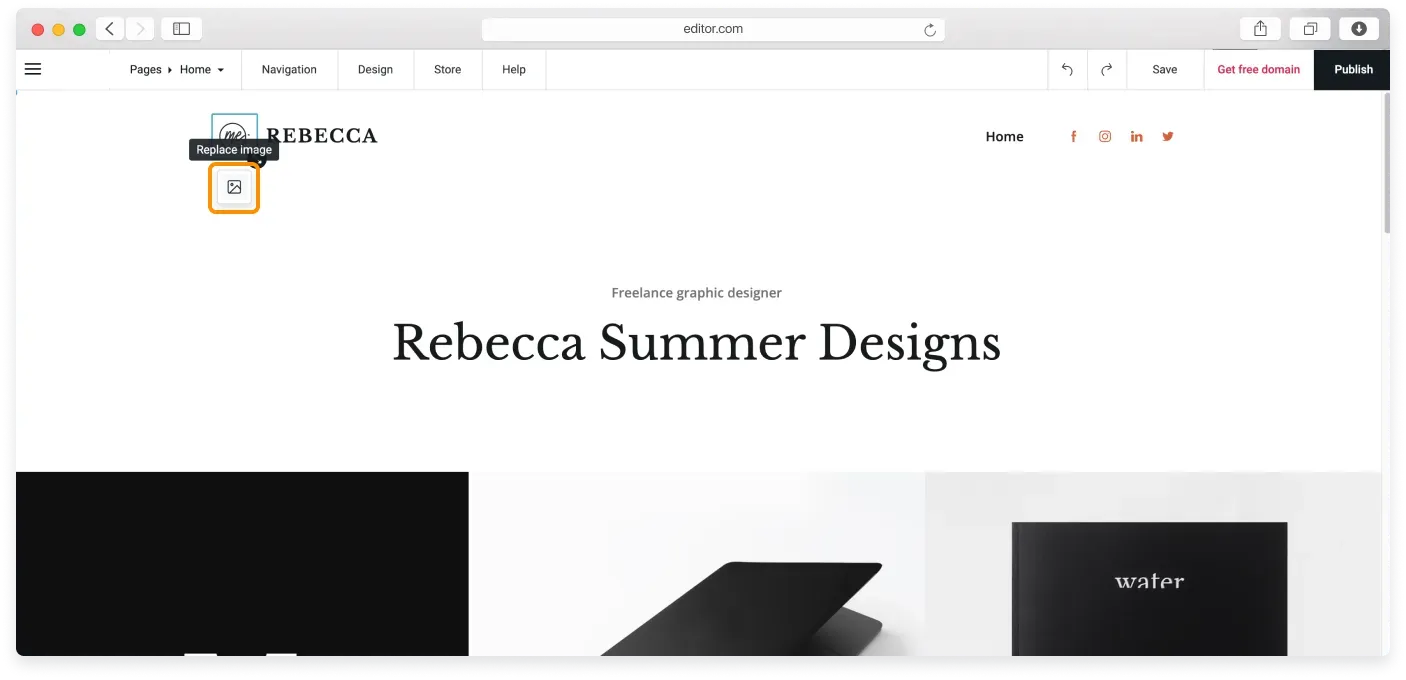
Click the logo image to activate the Replace Image icon, then click it.
-
Choose your logo file from your computer and click Open.
The logo image will be uploaded immediately.
When you upload your logo to the header, the smart interface automatically uploads it to your footer as well, so you don’t need to add it twice.
Logo file requirements
Your logo must be one of the following formats: .jpg, .png, .gif, .jpeg, or .svg. The maximum dimensions of a logo are 250x250 px.
Resizing the logo
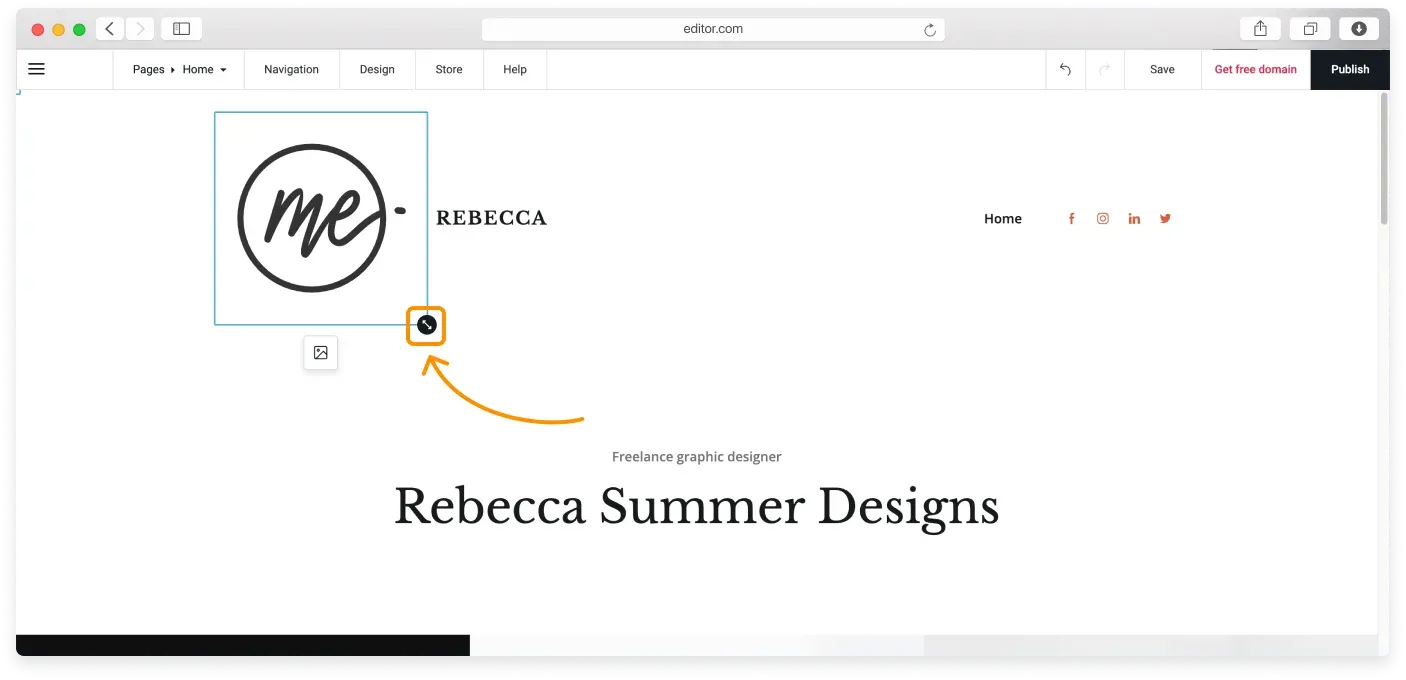
To quickly resize the logo image, click it and drag the resize control to make the logo bigger or smaller. The header height will adjust automatically.
Adding a logo to the Footer block
When you add a logo to your header, it automatically uploads to your footer too. You just need to enable it if your template layout doesn’t have it by default.
Here is how to enable a logo in the footer:
-
Hover over the footer to activate the control pane, then click Block settings.
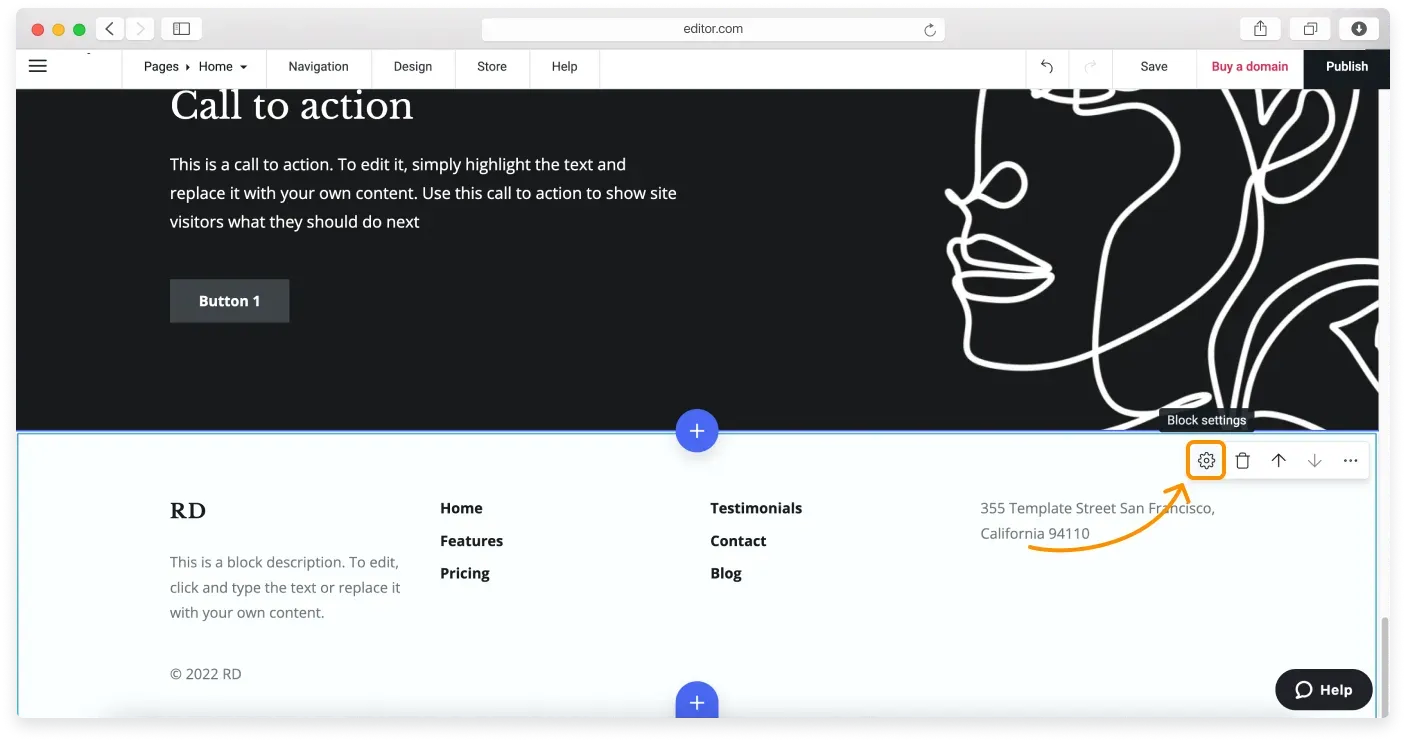
-
In the Layout tab, tick the Business logo option.
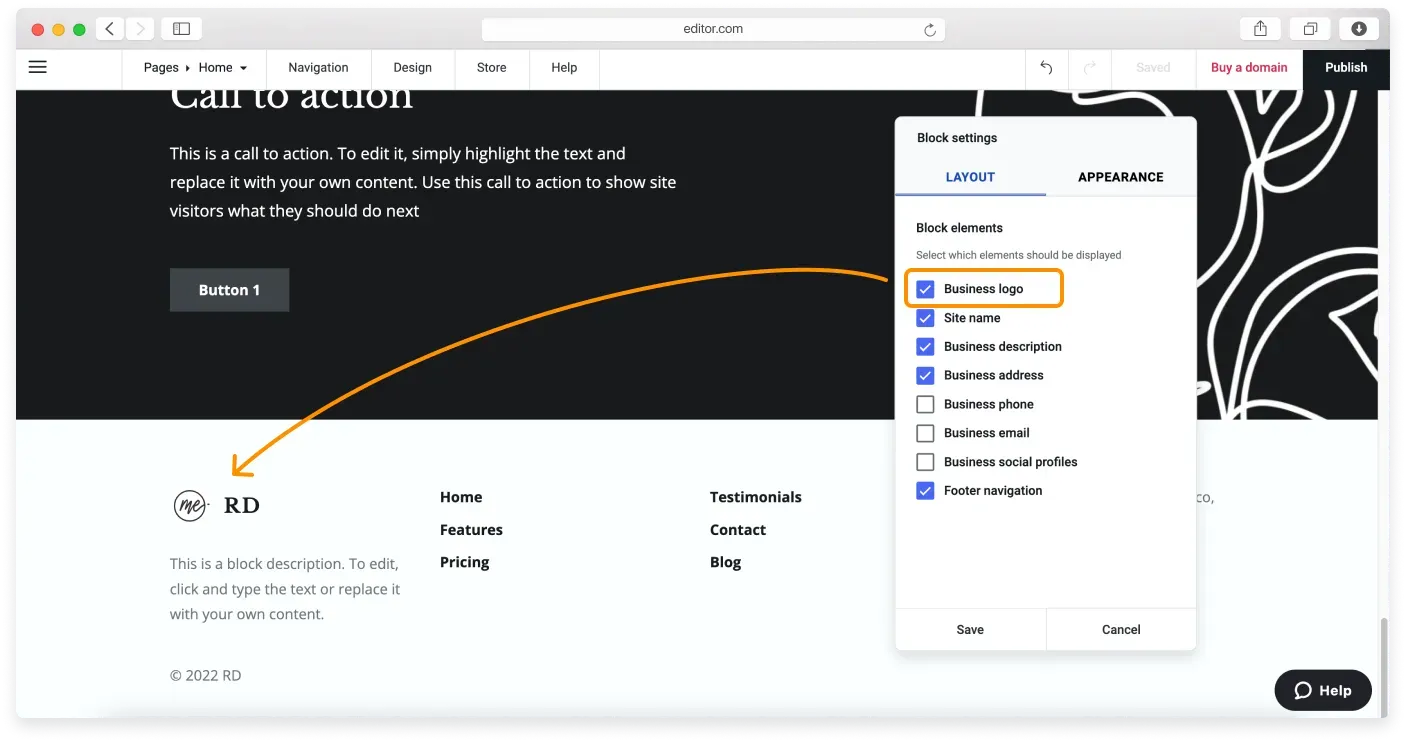
-
Click Save to confirm the change.
You can change your footer’s logo size by dragging the resize control icon in the bottom-right corner of the image.
Which logo file formats are supported?
The Website Builder supports the following file formats for your logo: .jpg, .png, .gif, .jpeg, and .svg.
The following file formats cannot be used:
- .ico
- .tiff
- .zip
- .doc
- .txt
- .rar
Some additional advice:
- Your logo should be produced in an RGB color model, which stands for red, green, and blue.
- Your logo should ideally have a transparent background, so it looks professional in transparent headers where the background image is visible.
Related articles
Can’t find what you need?
Contact our team. We’re here 24/7 by email and ticket.